Friday, April 12, 2024

You & Me | Frosty and Friends collection | Pretty Little Studio

Hi creative friends!

It's Tarrah back with you and today I am sharing a new layout featuring the gorgeous Frosty and Friends collection by Pretty Little Studio

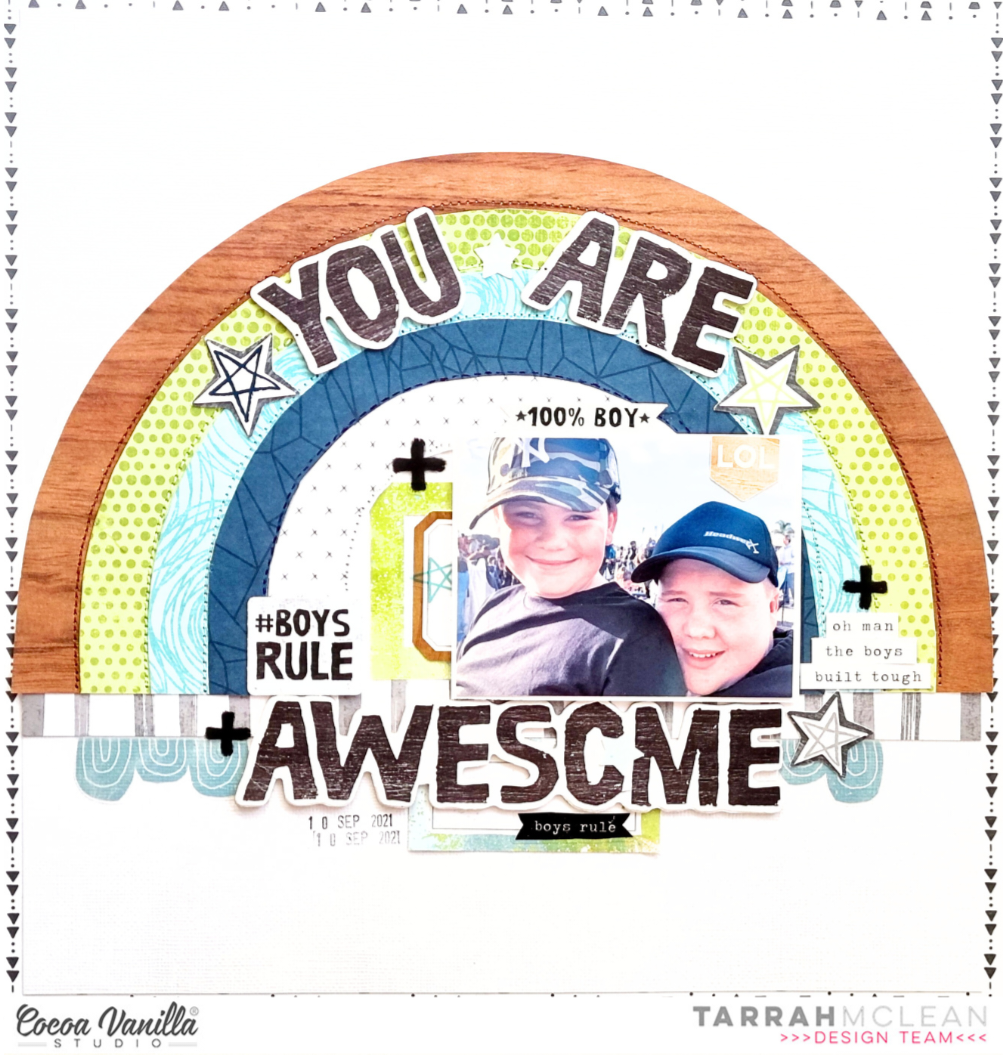
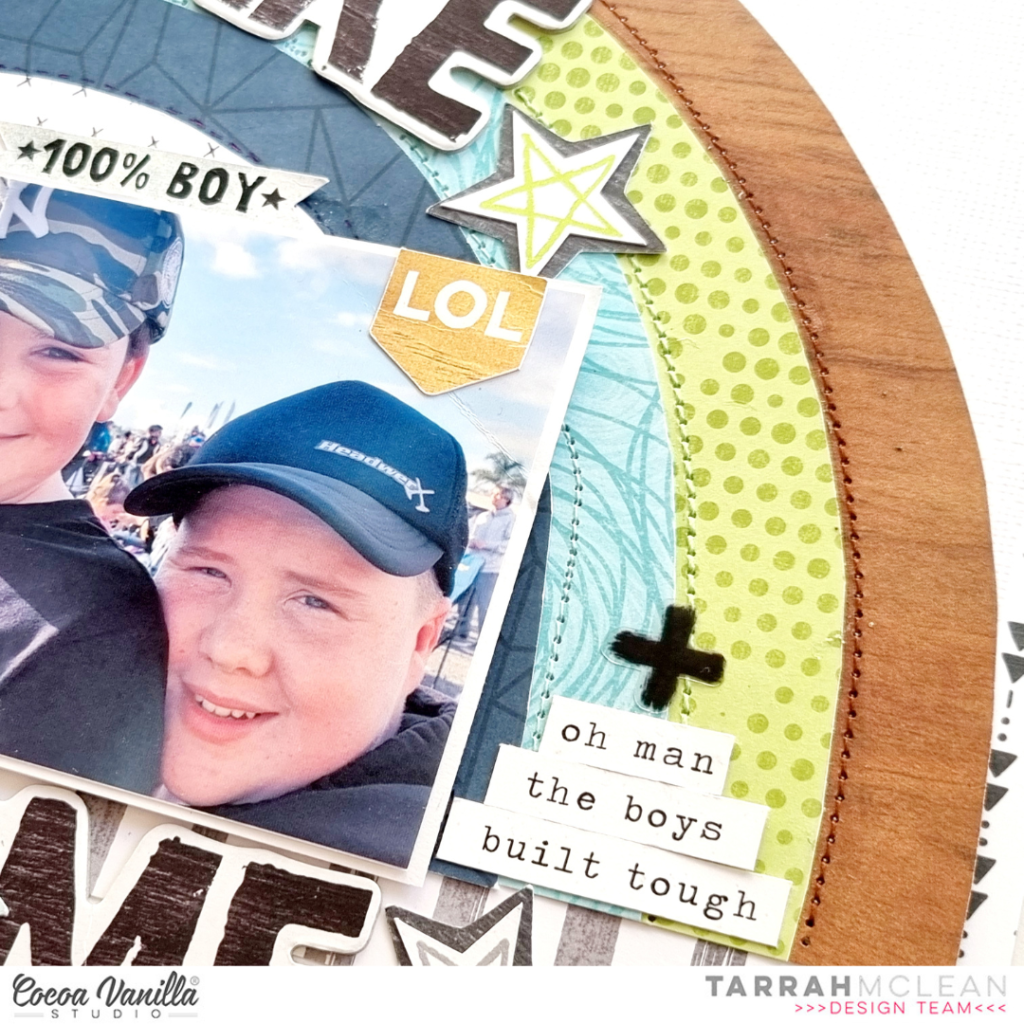
Even though this collection has a lot of winter and snow references, I was still able to create a layout featuring a photo of myself and my son on the beach!


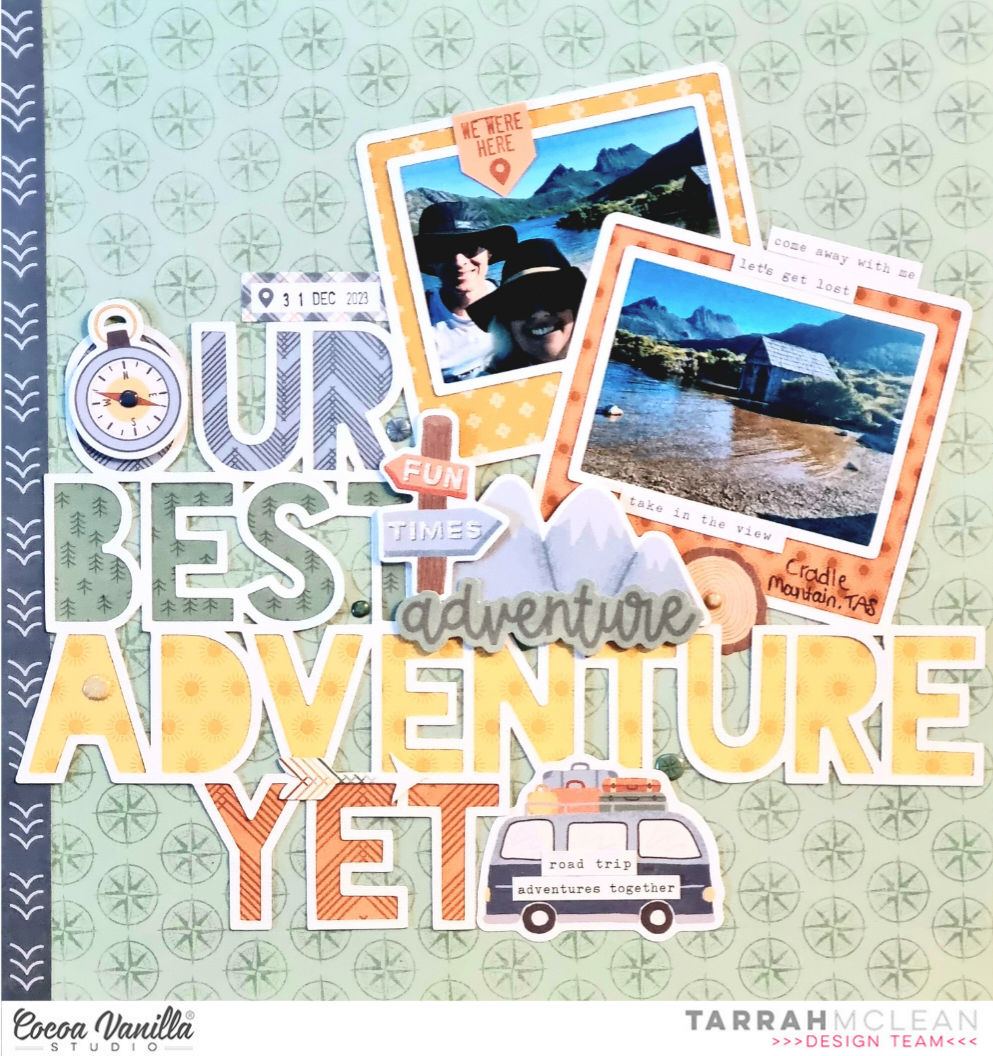
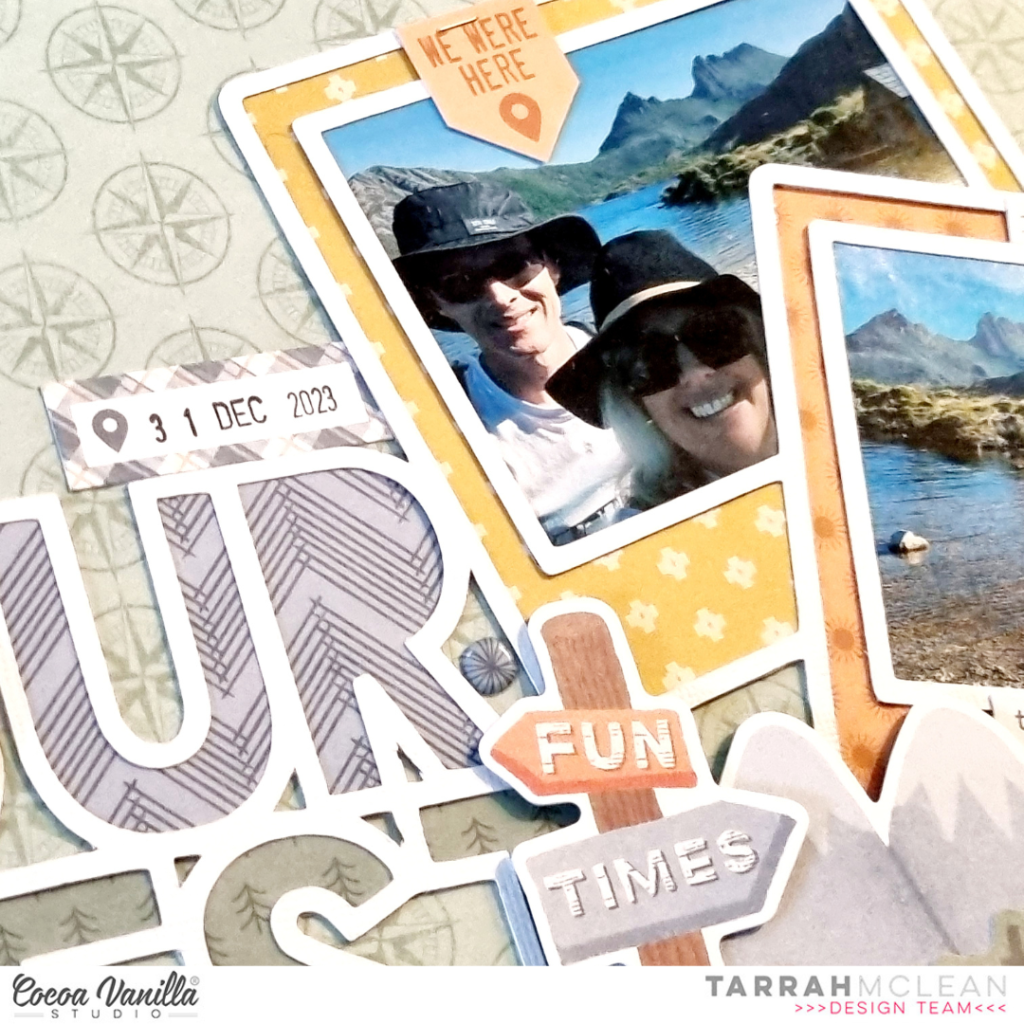
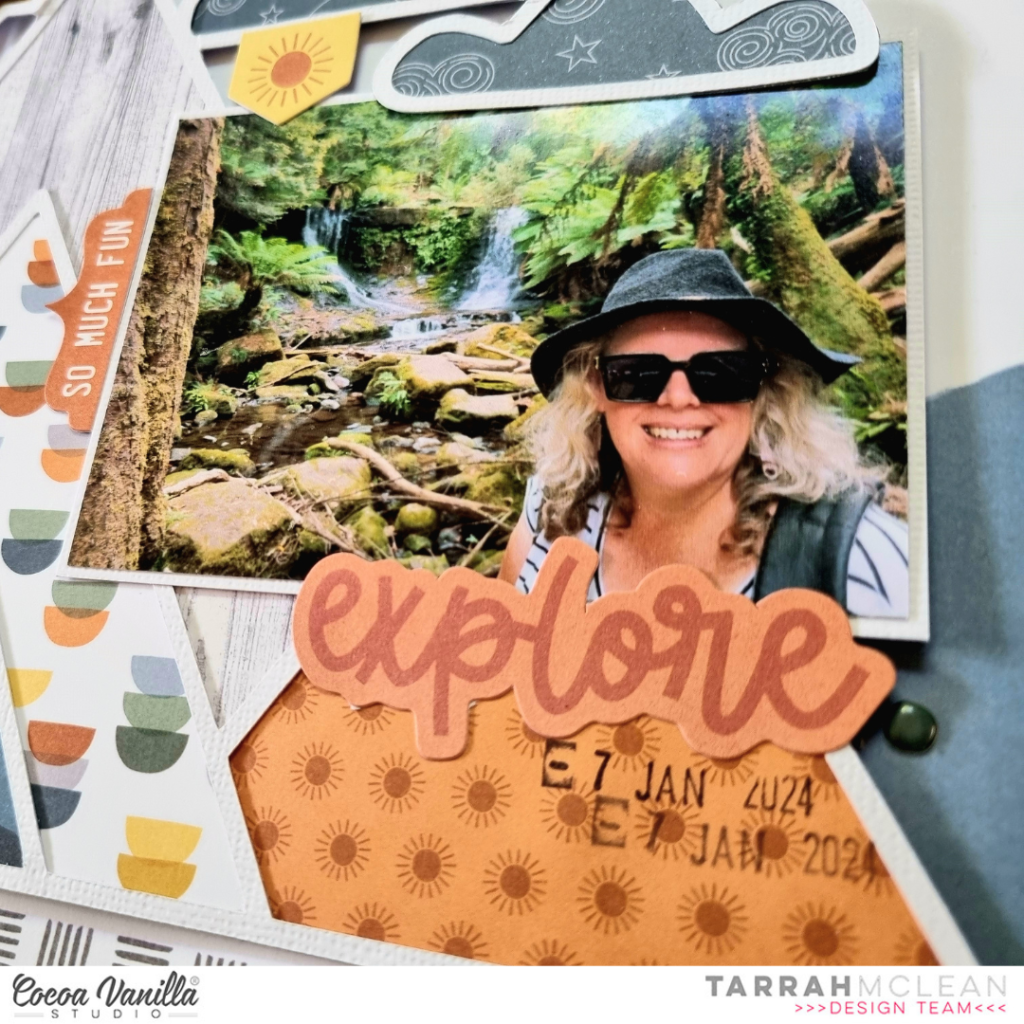
I chose the 'Winter' '12 x 12' patterned paper for my background, I really like the ledger look of this paper. I then began to create a focal point in the centre of the layout adding my photo here and layering some tags from the Fuzzy Socks die-cut pack and some cardstock frames from the Snow Angel frames pack. At the base of the photo I also added one of the scalloped die-cuts from the Snow Cream die-cut pack.


On the right of the photo, I also added one of the gorgeous flair buttons, this one is from the Let It Snow pack. I also placed some hearts here and a stitching clear sticker too. My title 'You and Me' is the only item on my layout that is not from the Frosty and Friends collection - its actually from the Glitter and Ice collection and can be found in pack from here.


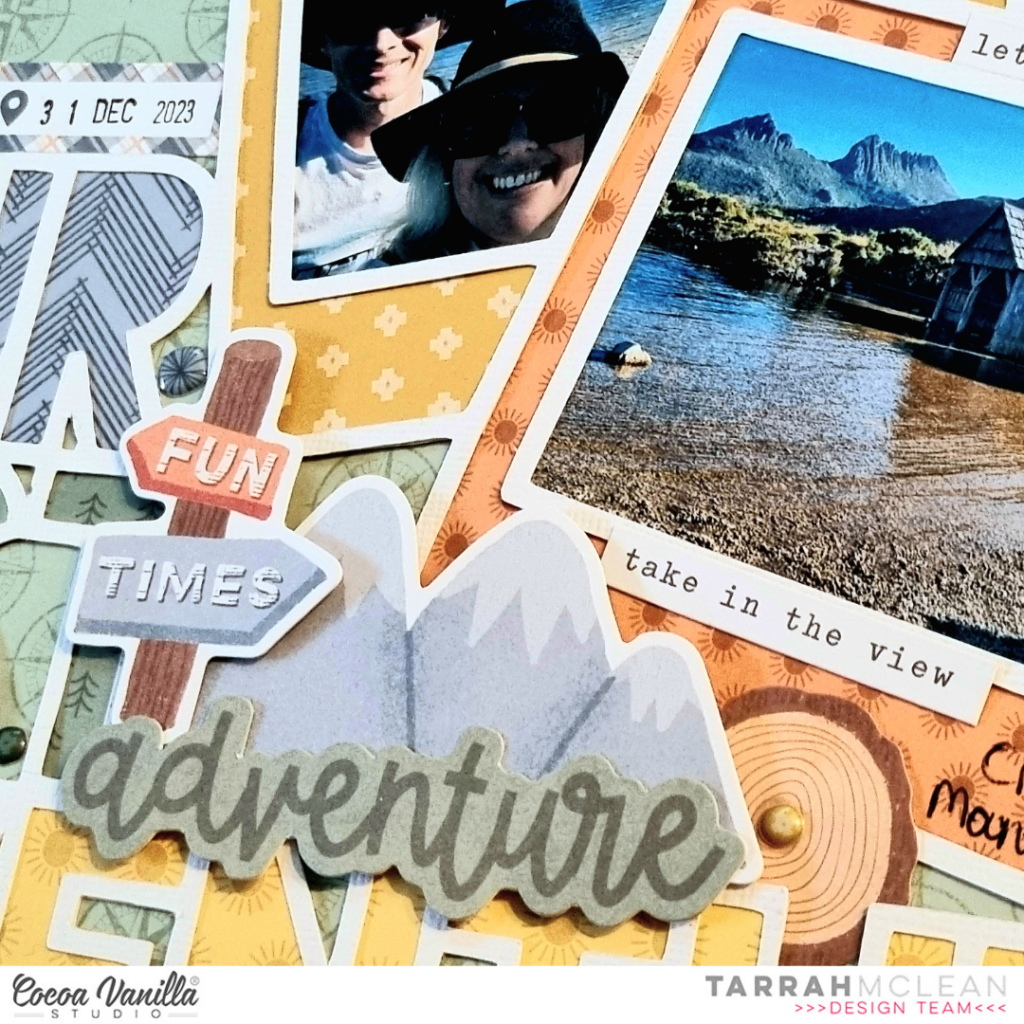
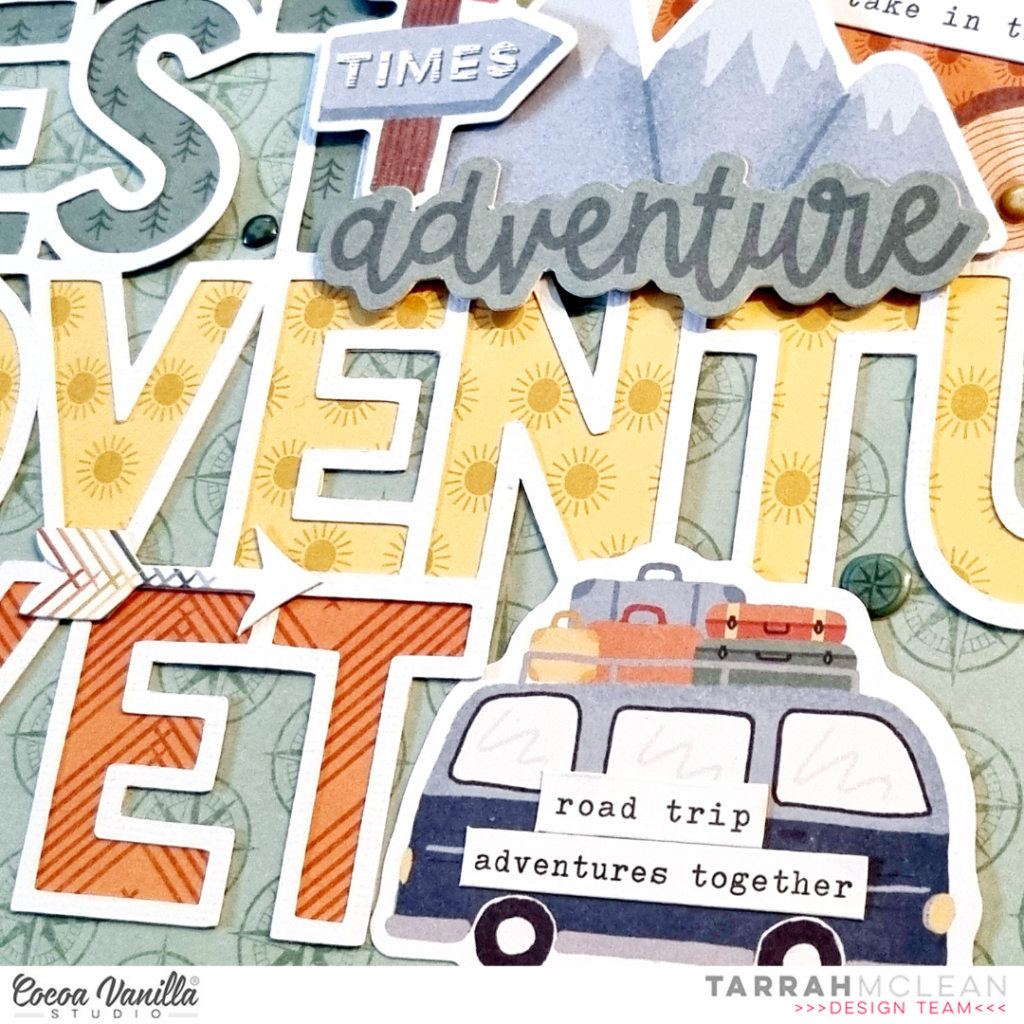
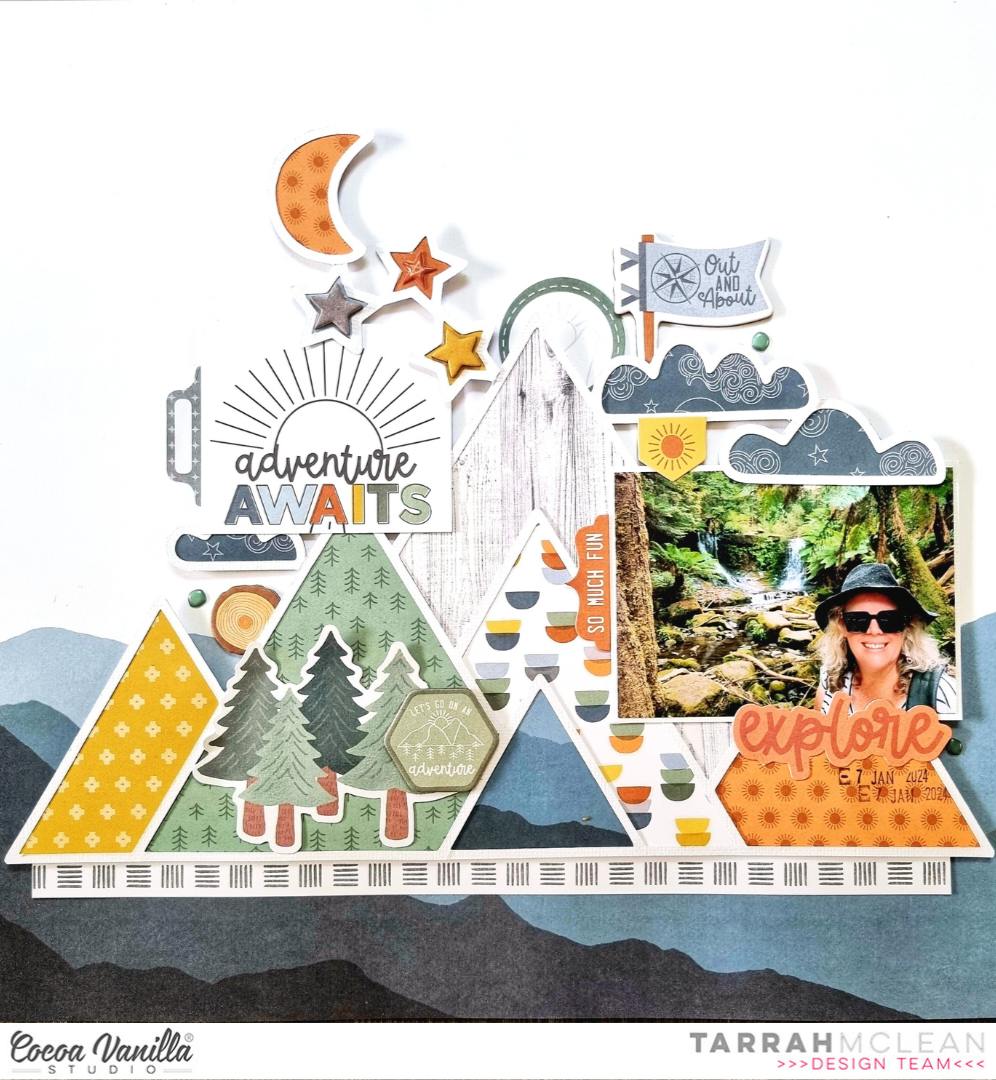
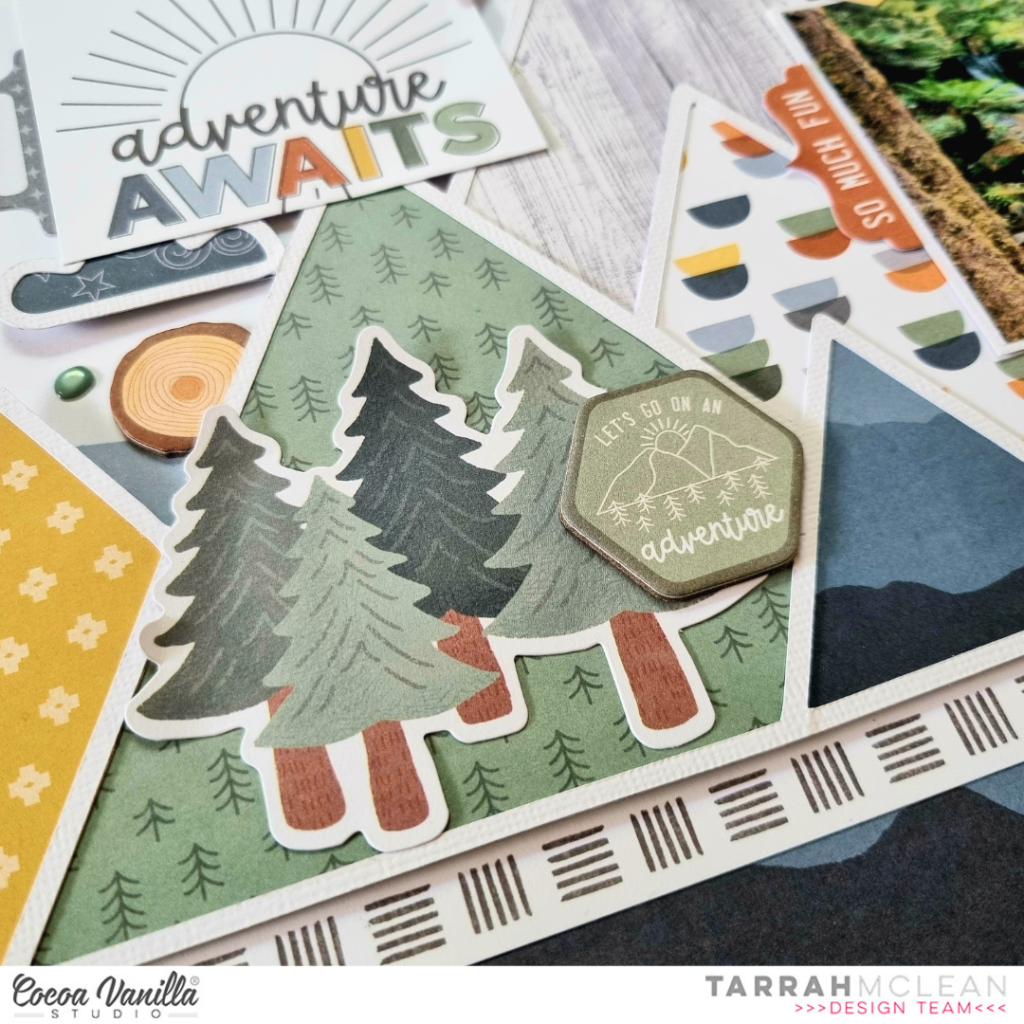
I created a cluster both above and below the main focal point of my layout to add some detail and interest to the page. I also added some details down the sides by placing Fruitcake stitches stickers on either side of the layout. Lastly I added some of the Marshmallow Wordfetti stickers to help tell the story of my layout. 


Thanks so much for stopping by my blog today!

Happy creating!

Tarrah x 

Tuesday, April 9, 2024

You Are Awesome | Boys Rule collection | Cocoa Vanilla Studio

 Hi creative friends!

It's Tarrah back with you and today I am sharing a new layout inspired by the new April challenge by Cocoa Vanilla Studio to include a big rainbow as the main element on your layout. I decided to go with a non-traditional rainbow and created my own using various papers from the Boys Rule collection.

The new monthly challenge for April is to include a BIG rainbow as the main design element on your layout.

To help create the arches of the rainbow, I used various sized dinner plates and traced around the tops of them on the different patterned papers I chose from the Boys Rule collection.  I chose these following papers from the Boys Rule collection: 'Fun and Games', 'Straight and Narrow', 'Entitled', 'Expressionist' and 'Star Fall'. I then arranged them on a plain white cardstock background and adhered them down. I trimmed the white cardstock down to measure roughly 11' x 11' and adhered it to the 'Boys Stuff' patterned paper. I then machine-stitched each individual colour in the rainbow with matching thread.

At the base of the rainbow, I adhered a strip of the 'Straight and Narrow' paper horizontally to add another layer to my layout. I added craft foam underneath my photo and placed it over on the right side of my page, I layered the frame and journal spot from the ephemera pack tucked in on the left hand side of the photo, on top of the photo I added one of the banner stickers from the Accessory Sticker sheet. My title is from the chipboard pack, I love these words! I added the 'You' and  'Are' words at the top of the rainbow and the 'Awesome' word under the photo. Either side of the 'Awesome' word, I added the scalloped border sticker from the Clear Sticker sheet. Above the photo, I added one of the banner stickers from the Accessory Sticker sheet. I punched out some stars from the 'Happy Go Lucky' paper and then layered some of the star stickers over the top. I placed a few of these around my page.

Once I was happy with how the larger elements were placed on my layout, I started adding some smaller embellishments including more clear stickers, more accessory stickers and some more ephemera also. One of my signature features on my layouts is to stamp the date of when the photo was taken and this layout is no exception, I stamped the date stamp using some black ink.

I don't often journal on my pages so I love the phrase and word stickers from the accessory sticker sheet. I add them to all of my Cocoa Vanilla layouts, where I can, to help tell the story. Boy layouts are one of my favourite projects to create and this one was so much fun to create! I really love how it turned out too. Make sure you create a layout and add a big rainbow element as your main design feature and share it with us by uploading it to the Cocoa Vanilla Studio Community Facebook page.

Thank you so much for stopping by my blog today! I hope you enjoyed reading about how I created my layout as much as I enjoyed creating it!

Happy creating!

Tarrah x

Sunday, April 7, 2024

Snow Globe | Snow Much Fun collection | Doodlebug Design Inc

Hi creative friends!

What is not to love about the new Doodlebug Design Inc shakers?! I mean there are so many possibilities to use these! You have seen the Doodle Shaker Pops right? Well now you can create your very own shaker pops or cards or whatever you want! I decided to create a snow globe using the new DIY Snow Globe kit, the Snow Much Fun collection and of course the new shakers!


Firstly I created a scene on the back piece of the globe by adding a sheet of patterned paper from the 6' x 6' paper pad and then layered the Let It Snow acetate over the top. To create the scene I took pieces from the Odds and Ends ephemera pack and added the Snow Cute Doodle Pop also. I also added some small puffy stickers and some clouds too. On the white parts of the ephemera, I added some Kindyglitz for some extra sparkle. Once the backing was done, I tested how it looked and then added a lot of the Lily White shaker balls inside the globe. 


For the outside, I added the Winter Wonderland paper to the top of the globe and also one of the scalloped border stickers from the This and That sticker sheet. At the base of the globe, I covered the black in the striped paper from the 6' x 6' paper pad. I took one of the phrase banner ephemera pieces from the Chit Chat pack and added this over the top. I then took one of the Frosty Fun Little Charmers and tucked it under the banner title. At the very bottom I added the tiny puffy hearts along the edge.   


Around the outer front edge, I took all of the snowflake puffy stickers and arranged them to fill the space. I did think about painting this part first however I decided not to and I am glad I just added the stickers. Once it was all dry, it was time to give a test and shake it up! It worked great and I love how it turned out.


Close up of the bottom section of the globe.


This was such a fun project to make! I hope you will give the shakers a go and create some cool projects with them! Thanks for stopping by my blog today!


DOODLEBUG PRODUCTS USED

Snow Much Fun collection
DIY Kit Snow Globe
Shaker Lily White balls

OTHER

Kindyglitz

Sunday, March 24, 2024

Easter Baskets | Bunny Hop collection | Doodlebug Design Inc

Hi creative friends!

Are you ready for the Easter Bunny? In case you aren't I have a cute Easter basket project you can make for the littlies! These are just so super cute and so easy to make too! You can download the free file here. I highly recommend printing these out, tracing the design onto some baking or tracing paper. You can then transfer the design onto whatever paper you like. Please note that the light blue lines are fold/score lines. Use a scoring tool for these parts for ease of folding them into shape. 

  I am lucky enough to own a Silhouette Cameo machine and was able to convert the file from PNG to SVG and then add it in my Silhouette Studio Designer Edition. I was then able to change the solid light blue lines to dash/dotted lines to create a perforated line so that these parts may be folded. My Cameo machine then cut these out exactly as I needed them too!


Choose some of the gorgeous papers in the Bunny Hop collection to cut out your baskets with. 
Once you have all of your baskets cut out you can begin to assemble them. Simply fold the perforated parts and glue the scallop pieces behind the middle piece. I used a small peg until the glue was dry to help secure these. I love how you can see the detail in the folds once they are glued together!
Once both sides are done, you can go ahead and attach the long handle in the same way. I did attach the handle on the outside though as I knew I would be covering up the joins.    


Once you have constructed your baskets, start decorating your baskets using some of the gorgeous embellishments from the Bunny Hop collection! I used the border stickers from This and That stickers around the tops of the baskets. I also added some Doodle Pops and Shaker Pops to each one - aren't Doodle Pops the best?! I love them so much! On top of the handles, I also added a word/phrase sticker and some small stickers. On the rabbit one, I also added some of the grass puffy stickers underneath.


OMG the cuteness is too much! I just love how these turned out! I hope you will give these a try using the Bunny Hop collection! You will not be disappointed! 


I filled each basket with some thin wood shavings and of course some Easter Eggs too! These will make great little gifts for my work colleagues!


Thank you so much for stopping by my blog today! I hope you get to create some fun and cute Easter projects using the gorgeous Bunny Hop collection!


DOODLEBUG PRODUCTS USED

Bunny Hop collection

OTHER

Thin wood shavings
Silhouette Cameo machine
Easter Eggs

Saturday, March 23, 2024

Our Best Adventure Yet | Great Escape collection | Cocoa Vanilla Studio

 Hi creative friends!

It's Tarrah back with you and today I am here to share a new scrapbook layout featuring the awesome Cocoa Vanilla Studio Great Escape collection! I don't know about you but I love travelling and I love documenting those travels too! Recently my partner and I took a trip to gorgeous Tasmania, it was wonderful, these photos are from beautiful Cradle Mountain and this collection has been perfect to document our travels.

I started by cutting out a cut file from CUT to YOU from white cardstock and then backed the different words and frames with papers from the Great Escape A5 paper stack.

I added 2 photos in the frames of the cut file as well and I had to be strategic with what photo I added in the top frame due to the frame below covering up part of the photo. I chose the 'Direction' patterned paper as my background, I then cut the navy blue strip from the 'Wild Life' patterned paper and adhered it to the left hand side of the paper. Once the cut file was all backed, I adhered it to the same background paper. Usually I adhere my cut files using craft foam to pop them up, however for this layout I knew I wanted to pop up the mountains and other die-cut embellishments in the middle. I added the mountains, the Fun Times sign, the wood piece and the Adventure word all from the ephemera pack.

I also placed the compass die-cut to the middle of the 'O' of the word 'Our' in the cut file, I used craft foam for this piece also to pop it up off the page. Down next to the 'Yet' word, I placed the super cute camper die-cut and layered some phrase stickers from the Accessory Sticker sheet on top from the ephemera pack. Once the larger elements were added to my page, I then added a few smaller embellishments including puffy enamel shapes and some more stickers from the Accessory sticker sheet, including the arrow sticker and the journal spot above the word 'Our'. I love how the puffy enamel shapes add a touch of colour and dimension and I love how the phrase stickers help to tell the story if you don't feel like journaling!

Lastly I stamped the date stamp and journaled where the photos were taken. I love how this cut file helped to make the design and placement decisions on my layout and the Great Escape collection really does make it so easy to create great memories!


Thanks so much for stopping by my blog today! I hope you enjoyed reading about how I created my layout as much as I enjoyed creating it! Make sure you get your hands on the awesome Great Escape collection!

Happy crafting!

Tarrah x

Sunday, March 10, 2024

Easter Bunny | Bunny Hop collection | Doodlebug Design Inc

Hi creative friends! 

Easter is just around the corner and what better way to celebrate than with a cutesy layout featuring the gorgeous new Bunny Hop collection. This collection is just so EGGS-ellent and adorable! My 2 sons meeting the Easter Bunny are the subject of the photo, they are a little older than this now lol!  


I decided on a grid-style design for my layout and cut out some large scalloped circle die-cuts and some smaller ones from various colors in the Bunny Hop textured cardstock pack. I also took the 6' x 6' paper pad and cut some regular circles die-cuts out and layered those on top of the scallops. I layered the smaller scalloped circles on top of the regular ones and love how they turned out! 


I arranged them all on a piece of white cardstock and trimmed the cardstock down to measure 11' x 11' I then adhered this to the Easter Basket patterned paper. I adhered the title of the page to the centre circle using craft foam, taking the title from the Chit Chat pack. 


I added sticker and die-cut embellishments from the Bits and Pieces pack, Odds and Ends pack and the This and That sticker sheet to all of the circles, pretending these were like small little layouts. I also added Hello Spring sprinkles and puffy sticker icons to decorate some of the die-cuts and to add texture too.


Thanks so much for stopping by my blog today! 

Happy creating!


DOODLEBUG PRODUCTS USED

Bunny Hop collection
Bunny Hop co-ordinating textured cardstock

OTHER

Date stamp
Black ink
Cuttlebug die-cut machine
Scalloped circle dies
Circle dies

Saturday, March 9, 2024

Adventure Awaits | Great Escape collection | Cocoa Vanilla Studio

Hi creative friends!

It's Tarrah back with you today to share another scrapbook layout featuring the gorgeous new Great Escape collection by Cocoa Vanilla Studio! I have documented another photo from my recent trip to Tasmania, this time a photo taken at pretty Horseshoe Falls. The Great Escape collection is absolutely perfect for outdoor adventures, nature photos and road trips!

I decided to start with a cut file found on the internet and cut this from white cardstock. I then took the A5 paper stack and backed the spaces in the cut file with a variety of different papers. Once the cut file was backed, I adhered it using craft foam to the Horizon 12' x 12' patterned paper. I cut a small strip of the 'B' side of the Wild Life patterned paper and tucked it in under the cut file t the bottom.

I placed my photo on the right-hand side of the page overlapping the cut file and allowing one of the clouds in the cut file to overhang onto the photo. I used craft foam to adhere the photo too. Above the photo, I placed a banner sticker, and on the left of the photo I placed a tab sticker all from the Accessory Sticker sheet. Below the photo, I placed the die-cut title 'Explore' from the ephemera pack and also added a puffy shape.

Also from the Wild Life patterned paper, I cut out the 3' x 4' card that says 'Adventure Awaits' and placed this right under the stars on the cut file again using craft foam to adhere it. I added another tab sticker to the left of the photo and also added the round sticker at the top of the mountain peak, both from the Accessory sticker sheet. I absolutely LOVE the chipboard elements in this collection! I added 2 of the stars, the flag popping out of the clouds, the log piece between the mountains and also the hexagon shape overlapping the mountains at the bottom. 

Once the larger elements were placed and I was happy with them, I went ahead and placed some smaller finishing touches like some more puffy shapes and some extra die-cuts from the ephemera pack, I also stamped the date of when my photo was taken.

Thanks so much for stopping by my blog today! I hope you have purchased the Great Escape collection or have plans to purchase it really soon so you can get busy creating with it!  

Happy creating!

Tarrah x 

Sunday, February 25, 2024

Baked With Love | Made With Love collection | Doodlebug Design Inc

Hi creative friends!

Do you have a cute baker or chef in your family? I am very lucky to have one in my family and the Made with Love collection from Doodlebug Design is perfect to document these adorable photos of my little baker! 


I chose quite a few patterned papers for this layout - using 4 in total including Sugar Sprinkles, Flour and Sugar, Bake Me Happy and Dab of Butter. I decided on the Bake Me Happy paper for my background and trimmed down the Sugar Sprinkles paper to approximately 11' x 11' and adhered it to the Bake Me Happy paper. I then freehand drew a border around the edge using a black journal pen. I then trimmed down the Dab of Butter paper to measure 8' x 12' and adhered this piece to the centre of the layout. From the Flour and Sugar paper, I trimmed off the red gingham/plaid strip piece and the cocoa, flour and sugar jar piece. I adhered the red piece at the top of the Dab of Butter paper and the cute jar piece at the bottom.


I love the border stickers that are included on all the This and That sticker sheets! I added the small yellow scalloped one and the red plaid/gingham one at the bottom and the blue wavy one at the top. The Bake Me Happy enamel stickers are SOOO cute! I added lots of these at the top of the page! I just love their adorable faces!


In the centre of the page, I adhered my 2 cutie photos using craft foam to pop them up off the page a little. I did leave the sides of the photos free of adhesive so that I could add some embellishments, I often do this when I create my layouts, I then go back when I am happy with my page and extra adhesive to secure everything. You can see in the close up photo the shadows this creates on my page, I just love the added dimension. On the right of the photos, I added the round die-cut that says 'Baked With Love' from the Chit Chat pack. I added some of the enamel hearts from the With All My Heart pack. I also added one of the tab sticker here from the This and That sticker sheet.


Above the large photo, I tucked in the adorable rolling pin and above the smaller photo, the utensils both from the Odds and Ends pack. I also took the 'a-dough-rable' speech bubble from the Chit Chat pack and adhered that above the rolling pin. I also added the All You Knead Is Love speech bubble in the top left corner of the small photo. As my son has his apron on, I just had to add the apron cardstock sticker from the Icon sticker sheet. Lastly I stamped the date stamp using black ink and my layout was complete.


Thanks so much for stopping by my blog today! I hope you were inspired by my layout!

Happy creating!


DOODLEBUG PRODUCTS USED

Made With Love collection

OTHER

Date stamp
Black ink
Black journal pen

Friday, February 23, 2024

Tasmania | Great Escape collection | Cocoa Vanilla Studio

Hi creative friends!

It's Tarrah back with you and today I am sharing a new travel layout featuring the new Great Escape collection. I decided to document our recent trip to Tasmania, printing a total of 6 favourite photos all in a small format to create a vertical filmstrip look.


I chose 3 patterned papers to use for the background of my layout. I turned the Direction patterned paper over to show the green side, the Happy Camper patterned paper was left with the flags showing and I also turned the Horizon patterned paper to reveal the yellow suns. Once the papers were arranged and adhered, I placed the photo strip over to the right side of the layout.

For my title, I decided to spell the word Tasmania using the 'Fun Times Ahead' chipboard title. As I was spelling the word Tasmania in my head, I thought all of the letters were there in the 1 packet of chipboard except Tasmania has 3 A's so I did have to open a new packet of the chipboard elements and steal one of the A's from that pack! I placed the title along the top line of the Horizons paper and I also added one of the puffy titles under the chipboard title too.

Just above the Tasmania title, I placed one of the round die-cuts and also placed one of the banner stickers from the Accessory stickers through the centre of the photo strip. On the right of the photos at the top, I added the Let's Go flag die-cut and bent up the edges slightly to add some texture. To the direct right of the photos at the bottom, I added the tree chipboard and layered one of the phrase stickers from the Accessory sticker sheet over the top. I also added more of the phrase stickers above the Tasmania title.

Once the larger elements were added to my page, I added some of the smaller elements including one of the banner chipboard pieces below the Let's Go title and I created a cluster of embellishments at the very top of the page using stickers from the Accessory sticker sheet and a puffy sticker too. I added a couple more puffy stickers and finished by freehand drawing a border around the outside using my journal pen, stamping the date stamp and sprinkling some black mist to finish.

Thank you so much for stopping by my blog today! I hope you are inspired by my layout and got some ideas for your next project!

Happy creating!

Tarrah x 

Sunday, February 11, 2024

Love You | Lots of Love collection | Doodlebug Design Inc

Hey creative friends!

What do you get when you cross red, pink and blue together? The gorgeous Lots of Love collection by Doodlebug Designs that's what! I absolutely LOVE this colour combination and find it really easy to work with!!


I cut out 3 heart shapes from the 6' x 6' paper pad using some dies from my stash, I added craft foam underneath and adhered them to a plain white cardstock background. I trimmed down the white cardstock and adhered it to the Love You Bunches patterned paper. I then machine-stitched a border around the edge. I placed my photo over the centre heart and then placed 2 of the banners and the Love die-cut below my photo all from the Chit Chat die-cut pack. 


Do you love Doodlepops?! I absolutely LOVE them and just had to add those super cute Love Bugs Doodlepops sitting on top of the banners! I mean how cute are they?! I added some clusters of florals tucked into a few of the hearts and in the top left corner I placed the cute branch and birdhouse die-cut from the Chit Chat pack.


I really like adding the words and phrase stickers from the This and That sticker sheet to my projects, I like how they help tell my story as I don't journal on my pages much. I chose a few to be used on this page and I also added the blue xoxo heart sticker to the left hand heart and the floral heart sticker to the middle heart.


I placed a few small flowers and heart cluster die-cuts around the page to add some colour and interest to certain parts of the page. I also chose a few enamel dots in different colours too and added these for some extra dimension and colour.  


I love the shadows and dimension that are created when I add elements to my projects when I use foam tape. You can see some of the shadows in the close-up photo below.


Thanks so much for stopping by today!

Happy creating!


DOODLEBUG PRODUCTS USED

Lots of Love collection

OTHER

Cuttlebug die-cut machine
Heart Dies
White thread
Date stamp
Black Ink

LinkWithin

Related Posts with Thumbnails